Developer Tutorial: Making Your SPA Content Editable, Anywhere.
This content is deprecated, for this, please have a look at our Next.js Example.
Single Page Apps (SPA) have grown in popularity due to their ability to deliver dynamic user experiences, like those you would expect from a mobile or desktop application, quickly and easily. While SPAs are great from a user perspective, they can be a bit more challenging for your editors to make content changes and updates.
In part 1 of this post, I showed you how to use a headless CMS and React to build a Single Page App. Today, I’ll show you how you can make your SPA content editable in dotCMS.
One of the coolest features of dotCMS is the ability to edit a page using edit Edit Mode, which empowers users to:
- Add content
- Edit content
- Easily drag and drop to edit the layout (rows, columns, containers, reorder columns and rows)
- Reorder content by drag and drop
SPAs out the box are not editable in dotCMS because their HTML is created and rendered in a completely different server of dotCMS but with some work, we can make any SPA’ (React, Angular, Vue, etc) editable in dotCMS.
React Server Side Render
To make our SPA editable we need two things:
- Install a plugin on dotCMS and config the site
- Create a Node server that will render the HTML and send it back to dotCMS
Setup dotCMS for Edit Mode SPA
We need to tell dotCMS which server our SPA lives on in order to make it editable, to do that first:
Install the plugin
Go to https://demo.dotcms.com/c and login:
- User: admin@dotcms.com
- Password: admin
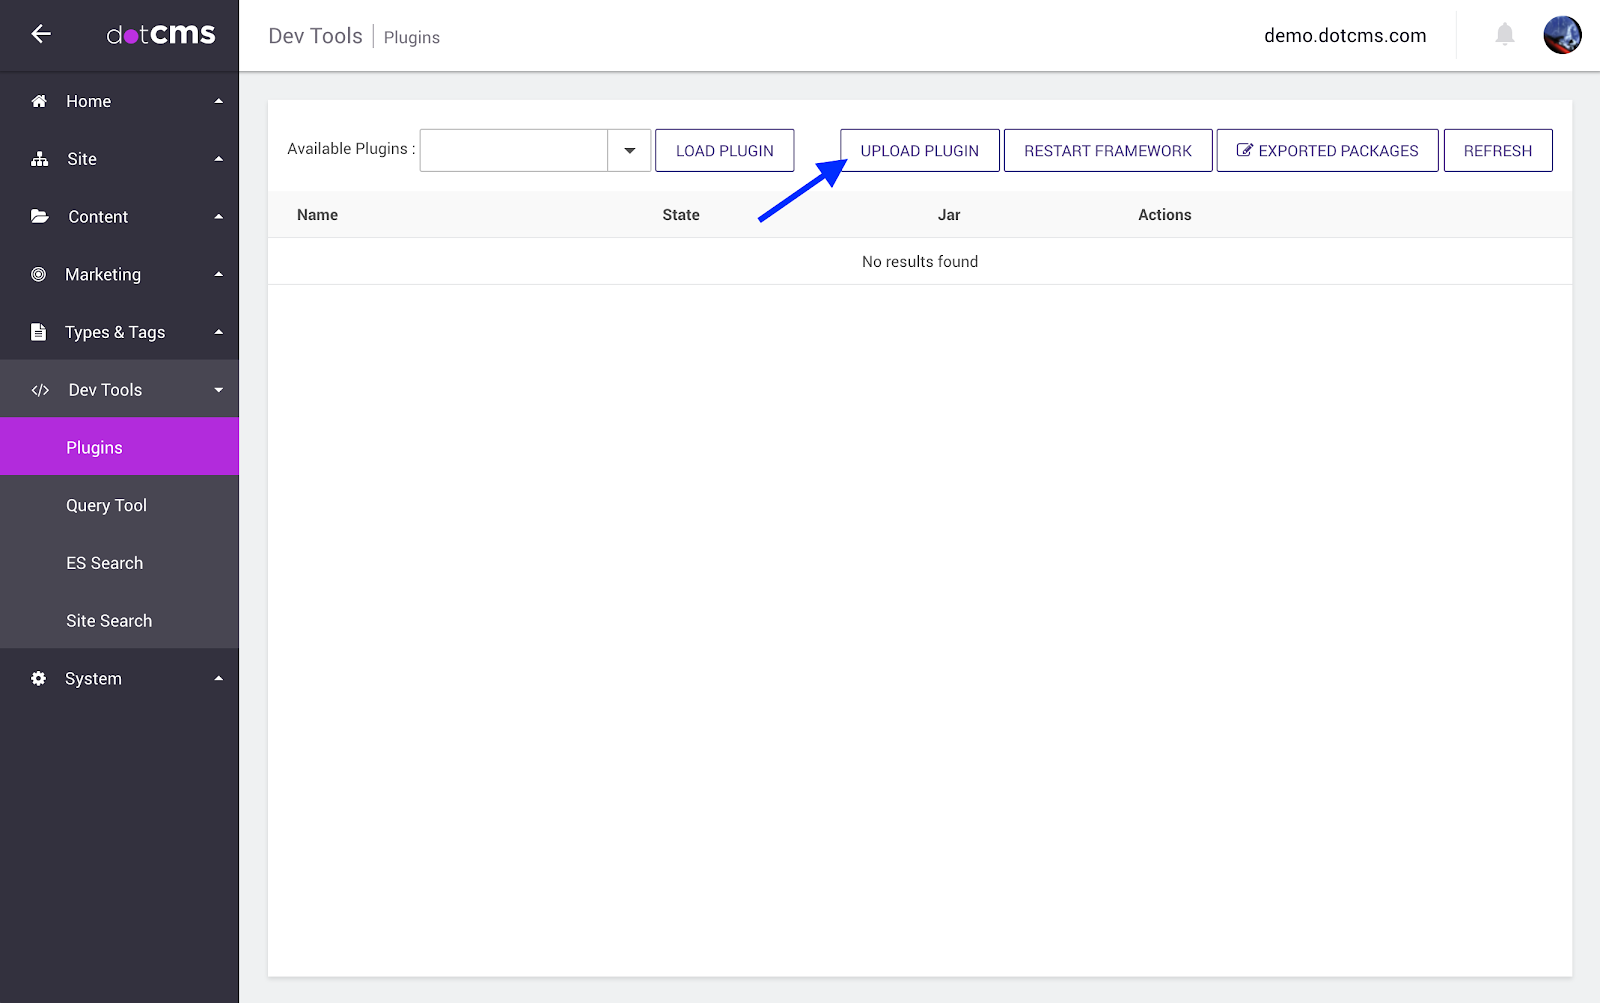
Download the plugin, unzip the file and upload both files to dotCMS in Dev Tools > Plugins

The result:

Point dotCMS to SPA
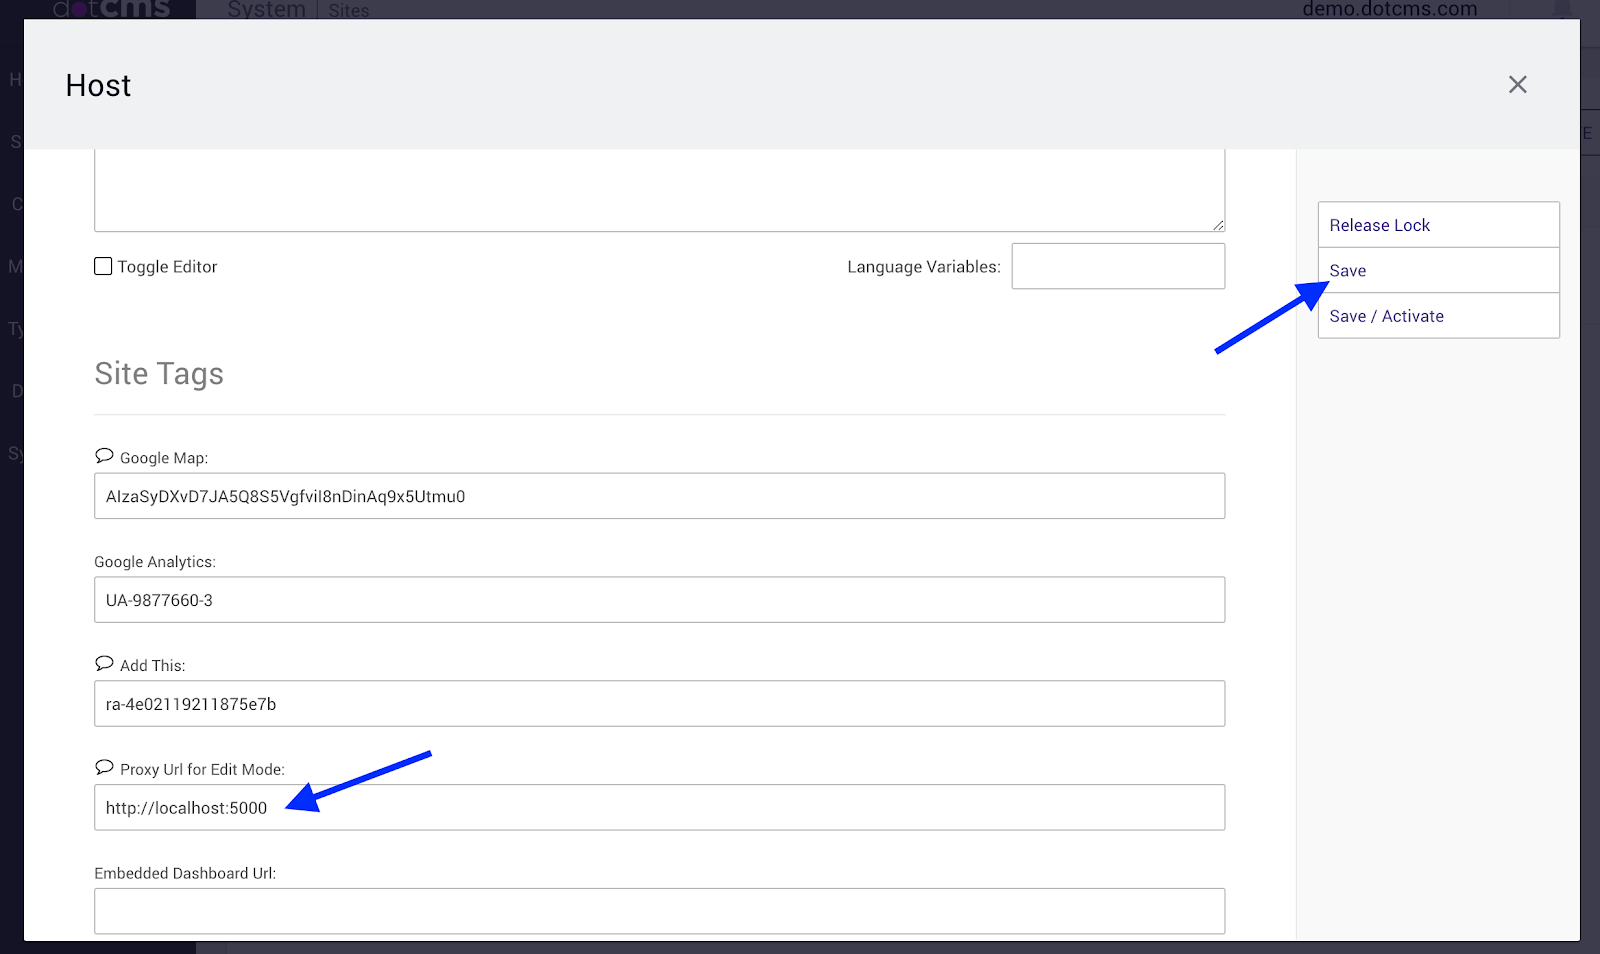
Go edit the dotCMS site System > Sites and edit demo.dotcms.com scroll all the way down to the field “Proxy Url for Edit Mode” and type: http://localhost:5000 then save.

With this setup, when you go to edit a page in dotCMS it will go and look for the HTML of that page in http://localhost:5000, which is a node server that we’ll setup next.
Node Server
What dotCMS needs to make a page editable is just a string of HTML with some data attributes. To achieve that we’re going to take our SPA and rendered server side.
Create the server
First we need some packages because Node doesn’t support JSX out of the box, so we need to transpile our code with Babel. Using npm let’s install:
npm i @babel/register @babel/preset-env ignore-styles --save
Create a folder folder in the root of the project named: /server/ and inside add a bootstrap.js file with the following code:
require('ignore-styles');
require('@babel/register')({
   ignore: [/(node_modules)/],
   presets: ['@babel/preset-env', '@babel/preset-react'],
});

require('./index');
This file will be our entry point but the server code (to handle http request) will live in: /server/index.js create that file and add the following:
import Page from '../src/components/Page';
import { renderToString } from 'react-dom/server';
import React from 'react';
import http from 'http';

const server = http.createServer((request, response) => {
    console.log(renderToString(<Page />));
    response.end(renderToString(<Page />));
});

server.listen(5000, err => {
    console.log('Server running http://localhost:5000');
});
We created an http server with node and start that server in port 5000. Our server right now do a simple job, it takes our <Page /> component and render to a string of HTML using React renderToString method. Then we log and response that HTML.
You can start the server, go to your terminal and run:
node server/bootstrap.js
And you should see in your terminal:

And if you open in your browser: http://localhost:5000 you’ll get:

And if you inspect your code in the Web Inspector, you should see:

Which means we’re rendering the <Page /> component to the browser but because we’re not sending any page object as props we get empty container.
Handling POST request from dotCMS
dotCMS will send a POST request to our node server with the Page Object in the body, we’ll use that page object to pass it as a prop to our <Page /> component on the renderToString method. Edit /server/index.js and add the following changes:
diff --git a/server/index.js b/server/index.js
index 9bb1e42..01dde65 100644
--- a/server/index.js
+++ b/server/index.js
@@ -2,10 +2,54 @@ import Page from '../src/components/Page';
 import { renderToString } from 'react-dom/server';
 import React from 'react';
 import http from 'http';
+import fs from 'fs';
+import { parse } from 'querystring';
+
+// Location where create react app build our SPA
+const STATIC_FOLDER = './build';

 const server = http.createServer((request, response) => {
-    console.log(renderToString(<Page />));
-    response.end(renderToString(<Page />));
+    if (request.method === 'POST') {
+        let postData = '';
+
+        // Get all post data when receive data event.
+        return request.on('data', chunk => {
+            postData += chunk;
+        }).on('end', () => {
+            fs.readFile(`${STATIC_FOLDER}/index.html`, 'utf8', (err, data) => {
+                const { layout, containers } = JSON.parse(parse(postData).dotPageData).entity;
+
+                // Remove unnecessary properties from containers object
+                for (const entry in containers) {
+                    const { containerStructures, ...res } = containers[entry];
+                    containers[entry] = res;
+                }
+
+                /*
+                    Rendering <Page /> passing down the props it needs.
+                    Sending variable "page" that we'll use to hydrate the React app after render
+                */
+                const app = renderToString(<Page {...{ layout, containers }} />);
+                data = data.replace(
+                    '<div id="root"></div>',
+                    `
+                    <div id="root">${app}</div>
+                    <script type="text/javascript">
+                        var page = ${JSON.stringify({ layout, containers })}
+                    </script>
+                    `
+                );
+
+                response.setHeader('Content-type', 'text/html');
+                response.end(data);
+            });
+        });
+    }
+
+    // If the request is not a POST we look for the file and send it.
+    fs.readFile(`${STATIC_FOLDER}${request.url}`, (err, data) => {
+        return response.end(data);
+    });
 });
This is a big change, let me explain what we’re doing here:
- In POST request (coming from dotCMS) we take the body (page object)
- After the stream of data ends, we read the build/index.html file of create react app built (we build this next)
- And parse the body so we can take the layout and containers
- Do some clean up in the containers by removing the containersStructure
- Render to string the <Page /> component but passing the props it needs to render all the page and inject that to the HTML code we get from the file.
- Also, we inject a global variable (page) with layout and containers that we’ll use to hydrate our app
- Finally, we set the header and make the server response to that request with the HTML of the page, that response is back to dotCMS.
- If the request is not POST (meaning is to get javascript, css or image files) we just look for that file in the build folder and response with it.
Update the client
Open the /src/index.js file and add the following changes:
diff --git a/src/index.js b/src/index.js
index aac3a39..3efddec 100644
--- a/src/index.js
+++ b/src/index.js
@@ -3,9 +3,14 @@ import ReactDOM from 'react-dom';
 import './index.css';
 import 'bootstrap/dist/css/bootstrap.min.css';
 import App from './App';
+import Page from './components/Page';
 import * as serviceWorker from './serviceWorker';

-ReactDOM.render(<App />, document.getElementById('root'));
+if (window.page) {
+    ReactDOM.hydrate(<Page {...window.page} />, document.getElementById('root'));
+} else {
+    ReactDOM.render(<App />, document.getElementById('root'));
+}
After the html of <Page /> is rendered react need to attach event listeners to it, for that we need to React Hydrate and we pass the same content (containers and layout) to the component.
If we don’t have window.page (that we injected from node) we use regular render.
Build the app
Go to your terminal and run:
PUBLIC_URL=http://localhost:5000 npm run build
We’re appending the PUBLIC_URL environment variable to the build command so when react build the index.html the url for the assets will be absolute, this way when our page loads inside dotCMS edit mode all the assets will be requested from the node server.
Edit a Page
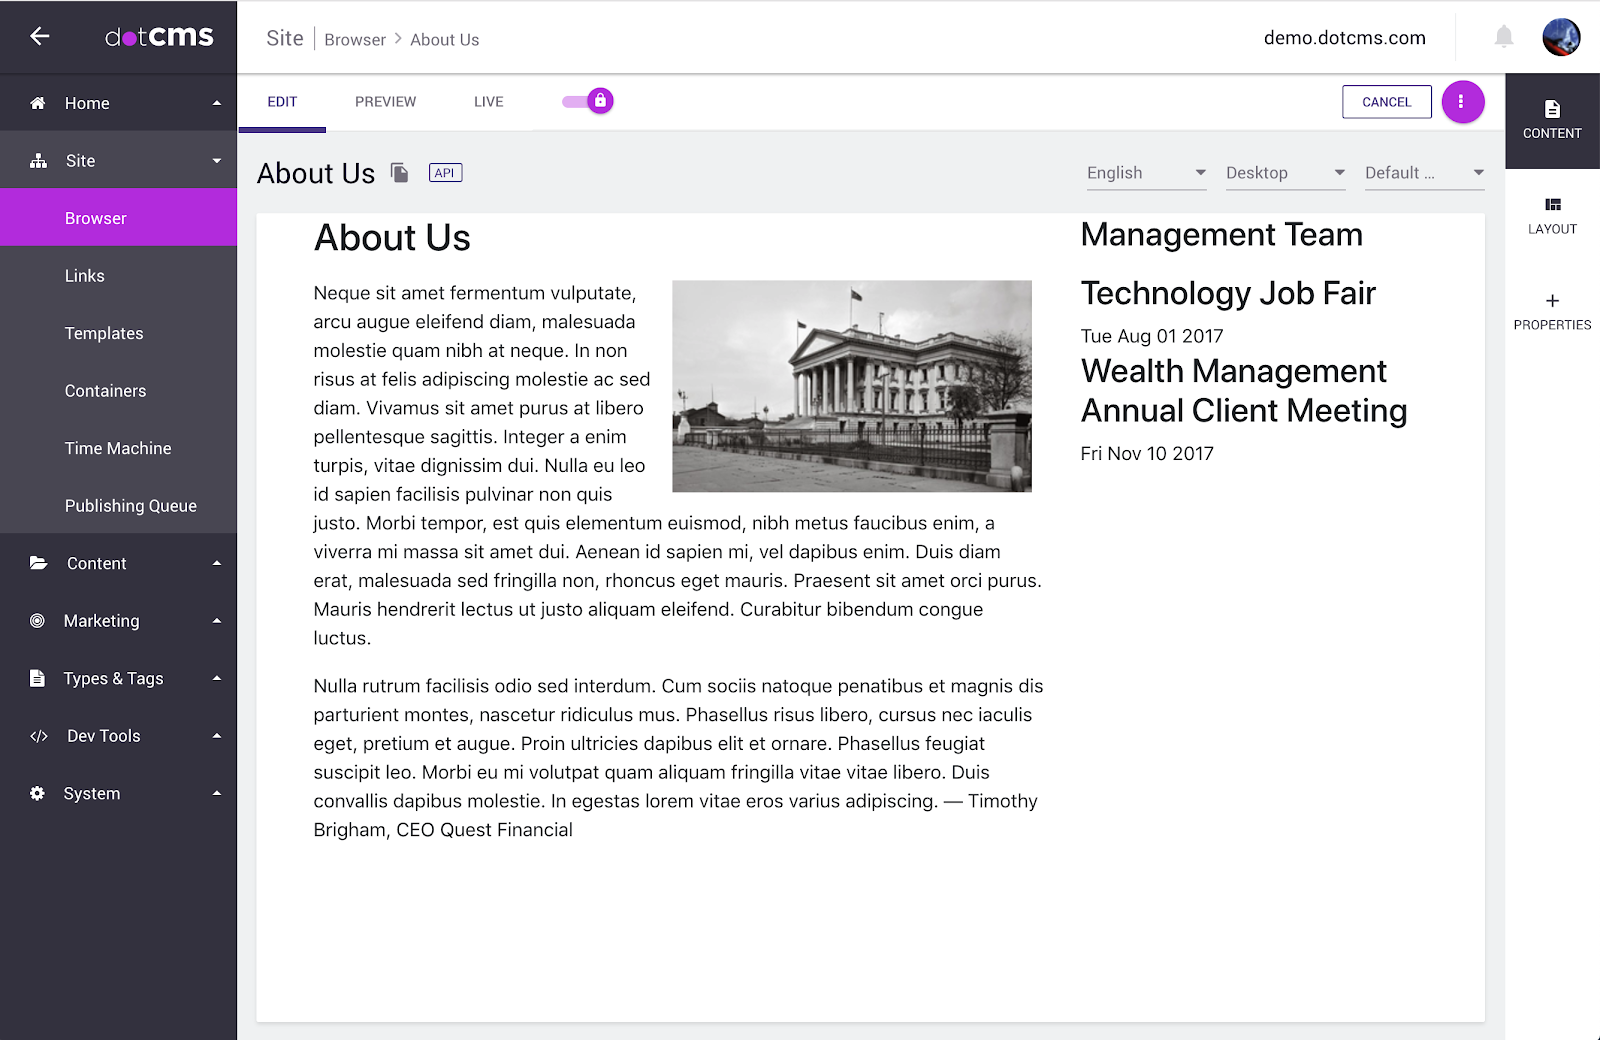
Go to dotCMS site browser and edit a page, if you do /about-us/index you should see:

As you can see the page loads but there is no edit tooling and that’s because we need to add special data-attr to the HTML we render in our node server.
Adding data-attr to our app
We need to create two more components that we’ll use to wrap our containers and contentlets. Create a new file components/DotContainer.js and add the following code:
import React from 'react';

const DotContainer = (props) => {
   return (
       <div
           data-dot-accept-types={props.acceptTypes}
           data-dot-object="container"
           data-dot-inode={props.inode}
           data-dot-identifier={props.identifier}
           data-dot-uuid={props.uuid}
           data-max-contentlets={props.maxContentlets}
           data-dot-can-add="CONTENT,FORM,WIDGET">
           {props.children}
       </div>
   )
};

export default DotContainer;
And now for the contentlets, create a new file components/DotContentlet.js and add the following code:
import React from 'react';

const DotContelet = props => {
   return (
       <div
           data-dot-object="contentlet"
           data-dot-inode={props.inode}
           data-dot-identifier={props.identifier}
           data-dot-type={props.contentType}
           data-dot-basetype={props.baseType}
           data-dot-lang={props.dotLang}
           data-dot-title={props.title}
           data-dot-can-edit={props.dotCanEdit || true}
           data-dot-content-type-id={props.dotContentTypeId}
           data-dot-has-page-lang-version="true"
       >
           {props.children}
       </div>
   );
};

export default DotContelet;
And now let’s use it, open and components/Container.js change as shown below:
diff --git a/src/components/Container.js b/src/components/Container.js
index 7f625fd..59a6204 100644
--- a/src/components/Container.js
+++ b/src/components/Container.js
@@ -1,8 +1,15 @@
 import React from 'react';
 import Contentlet from './Contentlet';
+import DotContainer from './DotContainer';

 const Container = props => {
-    return props.contentlets.map((contentlet, i) => <Contentlet key={i} {...contentlet} />);
+    return (
+        <DotContainer {...props}>
+            {props.contentlets.map((contentlet, i) => (
+                <Contentlet key={i} {...contentlet} />
+            ))}
+        </DotContainer>
+    );
 };
And for components/Contentlet.js change as shown below:
diff --git a/src/components/Contentlet.js b/src/components/Contentlet.js
index c447ef9..7b3e6bc 100644
--- a/src/components/Contentlet.js
+++ b/src/components/Contentlet.js
@@ -3,6 +3,7 @@ import React from 'react';
 import ContentGeneric from './ContentGeneric';
 import Event from './Event';
 import SimpleWidget from './SimpleWidget';
+import DotContentlet from './DotContentlet';

 function getComponent(type) {
     switch (type) {
@@ -19,7 +20,7 @@ function getComponent(type) {

 const Contentlet = props => {
     const Component = getComponent(props.contentType);
-    return <Component {...props} />;
+    return <DotContentlet {...props}><Component {...props} /></DotContentlet>;
 };
Now let’s build and run (after any change in any file inside /src/ folder you need to re-build):
PUBLIC_URL=http://localhost:5000 npm run build
node server/bootstrap.js
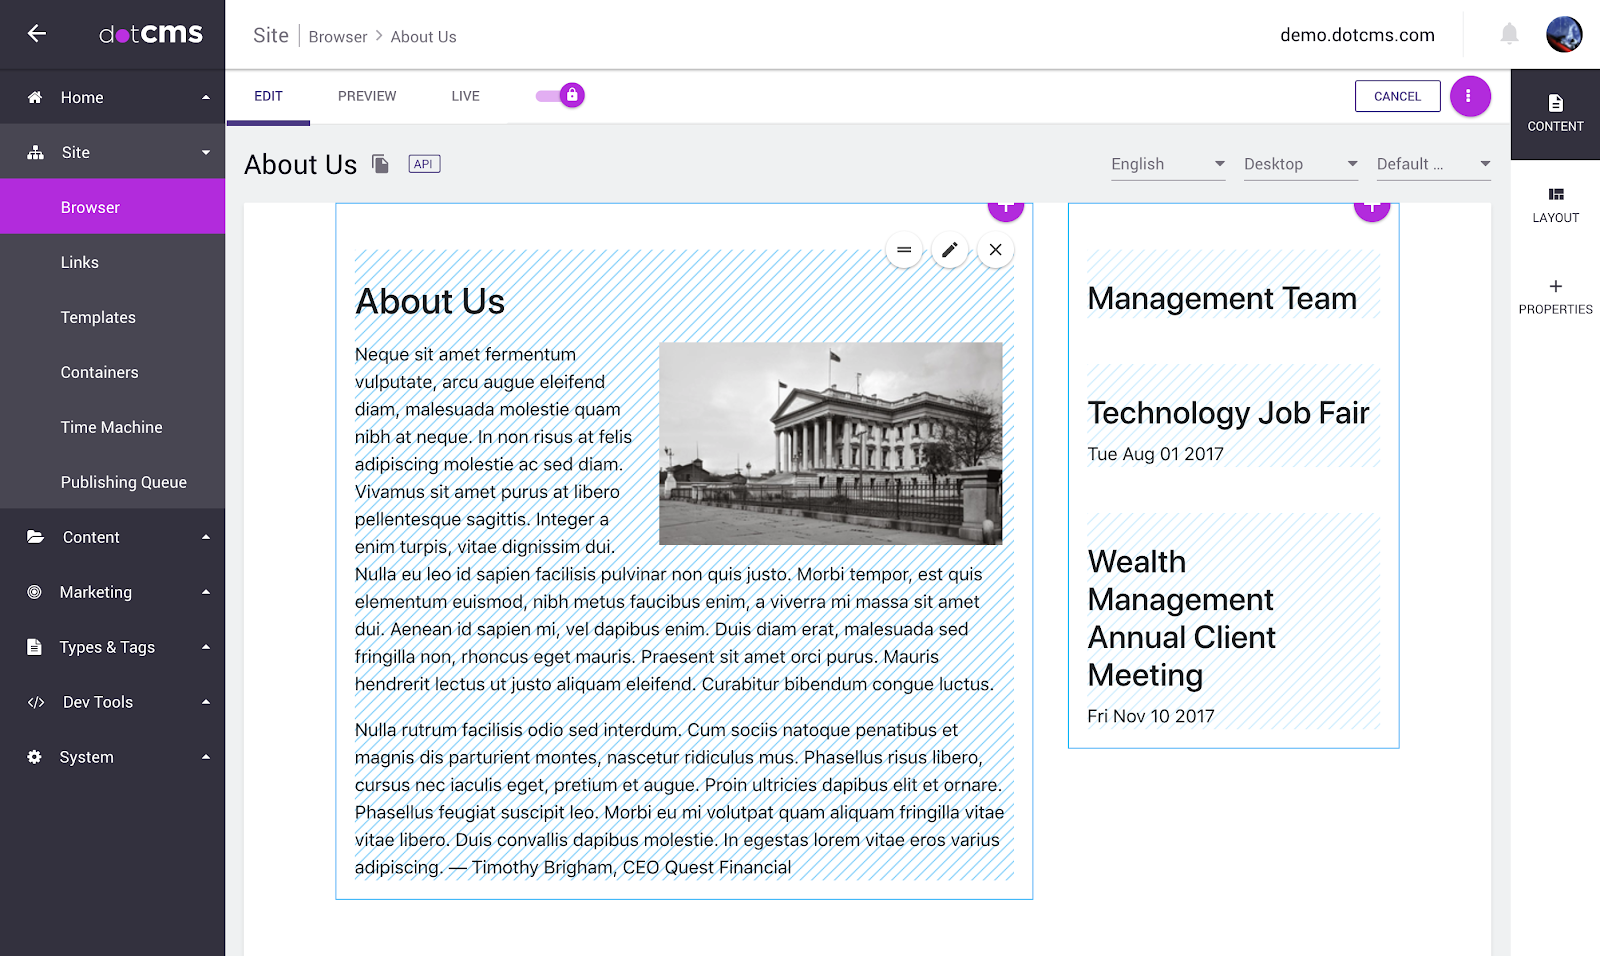
Then go back to Edit Mode in dotCMS, refresh the page and you should see all the tooling:

And that’s it! Congratulations, you’ve just make your Single Page App editable with dotCMS. Watch our YouTube video to learn more about dotCMS's latest feature, Edit Mode Anywhere.
Recommended Reading
AI-Powered Engagement: Building Trust Through Technology
The first episode of Real Talk, Real Trust covers AI’s role in building authentic engagement with clients. You can view the episode on YouTube and Spotify now, or read this blog to learn about their c...
Microsoft SharePoint vs dotCMS: A Comprehensive Comparison for Intranet
This blog post will break down the two most popular intranet solutions: SharePoint and dotCMS to help you decide which is best for your company.
Stability and Security: How the WordPress Licensing Dispute is Impacting Enterprise CMS
Recent events in the content management space, including WordPress's licensing disputes, have highlighted the critical need for stability in enterprise CMS platforms.


